Create an opportunity in eight easy steps
This tutorial will show you how easy it is to create your own opportunities on CuratorSpace. Our step-by-step instructions will guide you through setting up your open call, creating forms to gather the required details, and then finding (and inviting) artists to apply.
By creating an opportunity on CuratorSpace, you will be able to manage your open calls quickly and easily, while also finding artists all over the world who want to apply for your opportunity. CuratorSpace lets you:
- Gather all necessary information through custom submission forms without the need to follow up for missed details
- Track, manage, and make decisions about artists’ submissions in one place;
- Keep all messages and communications in one centralised location;
- And a whole lot more, including online judging, inviting artists to apply, and downloading all your submissions as PDFs or Excel spreadsheets.
Please note that after you publish your opportunity, it will be forwarded to our admin team for moderation before it goes live on social media. Our team aims to approve opportunities within 72 hours and we may contact you with any questions about your opportunity.
This is how your opportunity tabs will appear at the end, with your opportunity title in place of 'Your Opportunity'.

.png)
To begin creating your opportunity, simply go to https://www.curatorspace.com/members/opportunities and click on the 'Create a new opportunity' button to set up a new opportunity. You can also click the green button 'Create an opportunity' in your account area.

.png) Step 1: Name of Opportunity
Step 1: Name of Opportunity
First, begin by naming your opportunity. Make sure you include any relevant details, such as the type of opportunity, or location, if applicable. This will be the title of your opportunity and will let applicants know if the opportunity is suitable for them, eg. Paid Artist Residency in Suffolk, UK.
Following this, you can set a launch date. If you prepare your opportunity in advance, this can make the approval process quicker. Approved opportunities with a launch date set for more than 72 hours in advance will automatically go live on that date, helping to minimise the waiting time.
If you would prefer for the opportunity to go live as soon as it is approved, leave the launch date blank.

Click 'Next' for step 2.
Step 2: Type of opportunity
The 'Type of opportunity' page allows you to provide keywords and information to help us match you with appropriate artists who have profiles on the site.
Please select the type of opportunity by clicking on the dropdown menu, add the relevant types of work or keywords, and then select yes or no for the fee and cost-related questions. This will help us to match you with relevant artists with profiles on the platform so that you can invite them to apply directly to your opportunity.


Click 'Next' for step 3.
Step 3: Create your submission form.
When you click the green button 'Add a form', a new window will appear.
In the new window, please select the form you think is most appropriate for your needs. You can edit this by adding custom fields or creating a whole new form by selecting the 'Custom form' option.
To edit a form field, click the 'Update' button next to it. To add a new field, click the 'Add new detail' button. To see how your form looks, click the 'Preview form' button.
When you're happy with your form, click 'Next'.
For more help and information about choosing or creating submission forms, click here.


Step 4: Details
Now, provide further details about your opportunity, including the name of the organisers, the deadline and venue information, and if applicable, a link to your privacy policy.

Click 'Next' to go to step 5.
Step 5: More information
On this page, you can provide more detailed information about your opportunity. You can include the key themes or concepts of the opportunity, the venue, any associated costs or fees, and most importantly, the benefits of applying.
Adding as much information as possible will make your opportunity stand out and be attractive to artists. This will appear as the front page of your opportunity under the 'Description' tab.
You can create your document beforehand and then copy and paste by using your keyboard shortcuts.

Click 'Next' when you are happy with your description.
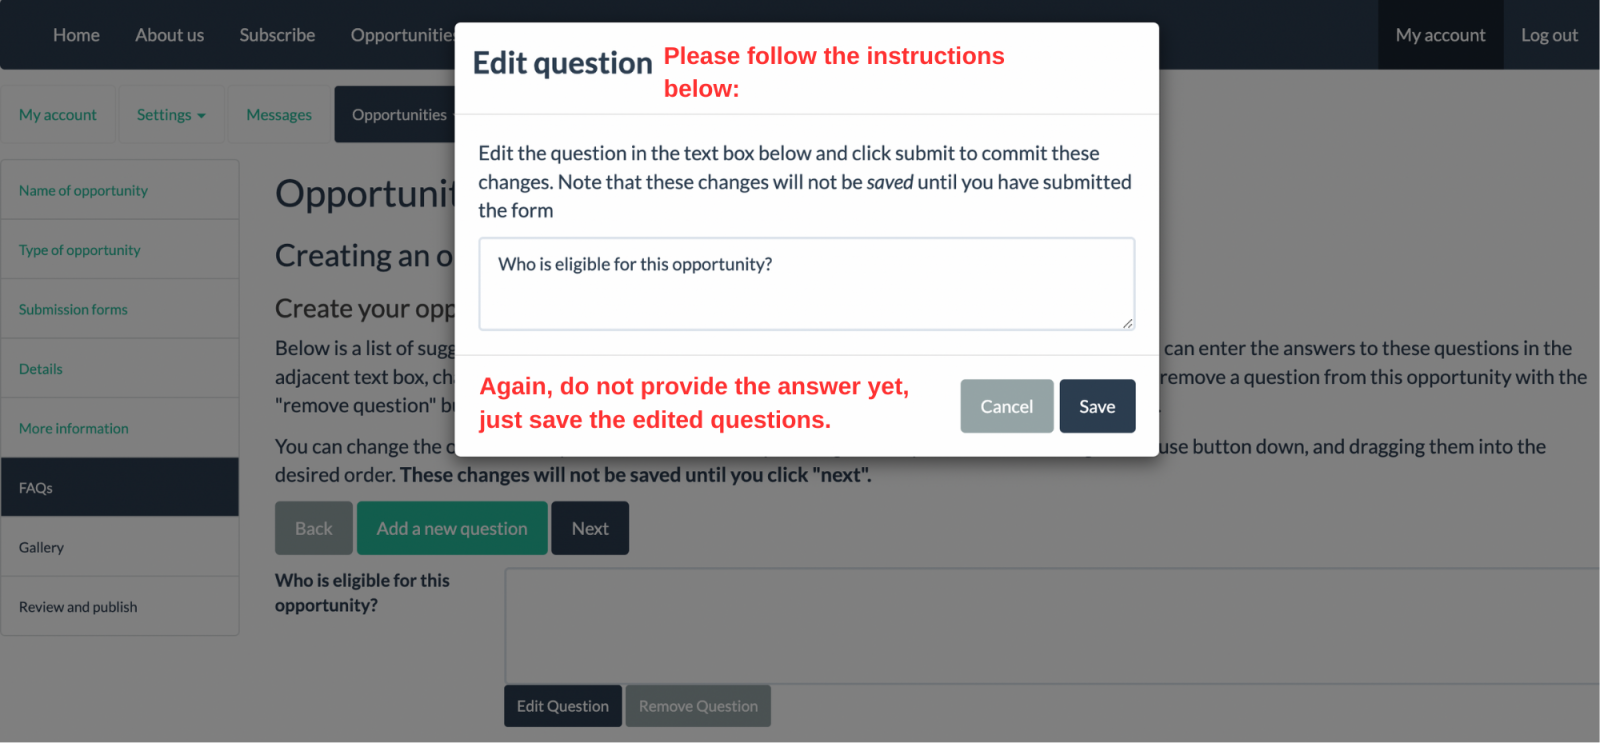
Step 6: FAQs
You can now create an Opportunity FAQ tab with further information or key points about the opportunity. We will automatically suggest a series of FAQs for you to provide answers, and you can edit these or add your own by clicking 'Add a new question'.
Any questions without answers will not appear on your finished opportunity.


Click 'Next' to continue.
You're nearly at the end. Now it's time to add images.
Step 7: Gallery
Although adding images is optional, it can make your opportunity more attractive and show the venue, types or work you are interested in, or previous events you've organised.\
To add images, you will first need to upload these to your media manager before adding them.

Images should be in JPG, GIF, or PNG format and cannot be larger than 4MB in size. If you need to resize your images, you can use a tool like https://imageresizer.com.
Remember to click on the images you want to attach in the media manager and click the Select these images button to attach them to the opportunity.
When you've finished, click 'Next'.
Congratulations! You have successfully created your opportunity. Time for the last step.
Step 8: Review and publish
Once your opportunity is published, it will be sent to our admin team for approval before it is shared on social media. We aim to approve opportunities within 72 hours.
Please note. Artists can contact you directly through the 'Contact curator' tab. You should not ask artists to apply directly to you on the description page. All submissions must be made through our CuratorSpace platform. Opportunities that contain direct links to an application form in the description will not be approved.


When you click on the 'Publish Your Opportunity' button, a new page will open, allowing you to choose whether to list your opportunity publicly or keep it private and just send it to specific people. Additionally, you can decide whether you want it shared on the CuratorSpace social networks and newsletter.
Once you click on the orange button 'Submit for review', the following pop-up will open. When you close it, you will see a list of artist profiles that match the keywords you entered at the beginning and you can invite people to apply to your opportunity directly.

 Submission Fees:
The easiest way to collect the submission fee is through CuratorSpace.
We use Stripe, and the processing fee is 60p or 6% per submission, whichever is higher.
The integrated system makes it easy to view artists' payments linked to their submissions, saving you time on matching payments or messaging artists.
Please get in touch, if you would like to have this function added to your account.
We hope this tutorial has been helpful in guiding you through the process of creating your own opportunities. If you require any further assistance, please don’t hesitate to reach out to as at help@curatorspace.com.
CuratorSpace isn't another listings website; it's a place where curators and organisers can use custom online forms to allow artists to apply to their opportunity. It also allows you to see and manage all submissions made to your opportunity on the website, and to contact contributors directly.
Register now and you can start making submissions and even create your first opportunity for free.