Wacky Lamps United Kingdom


Hi, my name is Steve and I handcraft unique lighting—steampunk, industrial-style lamps from galvanised iron pipe fittings, and upcycled lamps from often neglected, vintage items. My pipe lamps take the form of recognisable objects or robotic people, with the switch being an integral part of the lamp. With my vintage lamps, I always keep the aesthetics and original use of the item in mind.
An exciting imagination, the element of surprise and an eagerness to experiment, are three vital criteria I use when creating any new lamp. Add to the mix my pedantry nature for things having to be perfect and my unwillingness to be beaten, I really do sometimes make things difficult for myself!
I started creating unique, quirky indoor lighting in 2017—initially just a few pieces to help light up my partner’s craft stand at events. It was great fun, and I was hooked! I have always been practical and love to ‘tinker’, so I took things a stage further and started making lamps to sell on the stand at shows. Being a child of the 60s, some of the paraphernalia that I recall from my Dad and Granddad’s sheds—paraffin blowtorches and brass Aladdin oil lamps—were now vintage items, often discarded or found languishing at boot fairs. Soon I was salvaging these and making them into stylish lamps. Then, by chance, I discovered that the iron galvanised pipe fittings of my youth were still available and, with the trend for industrial and steampunk-style décor, I embarked on designing and making my own range of pipe lamps.
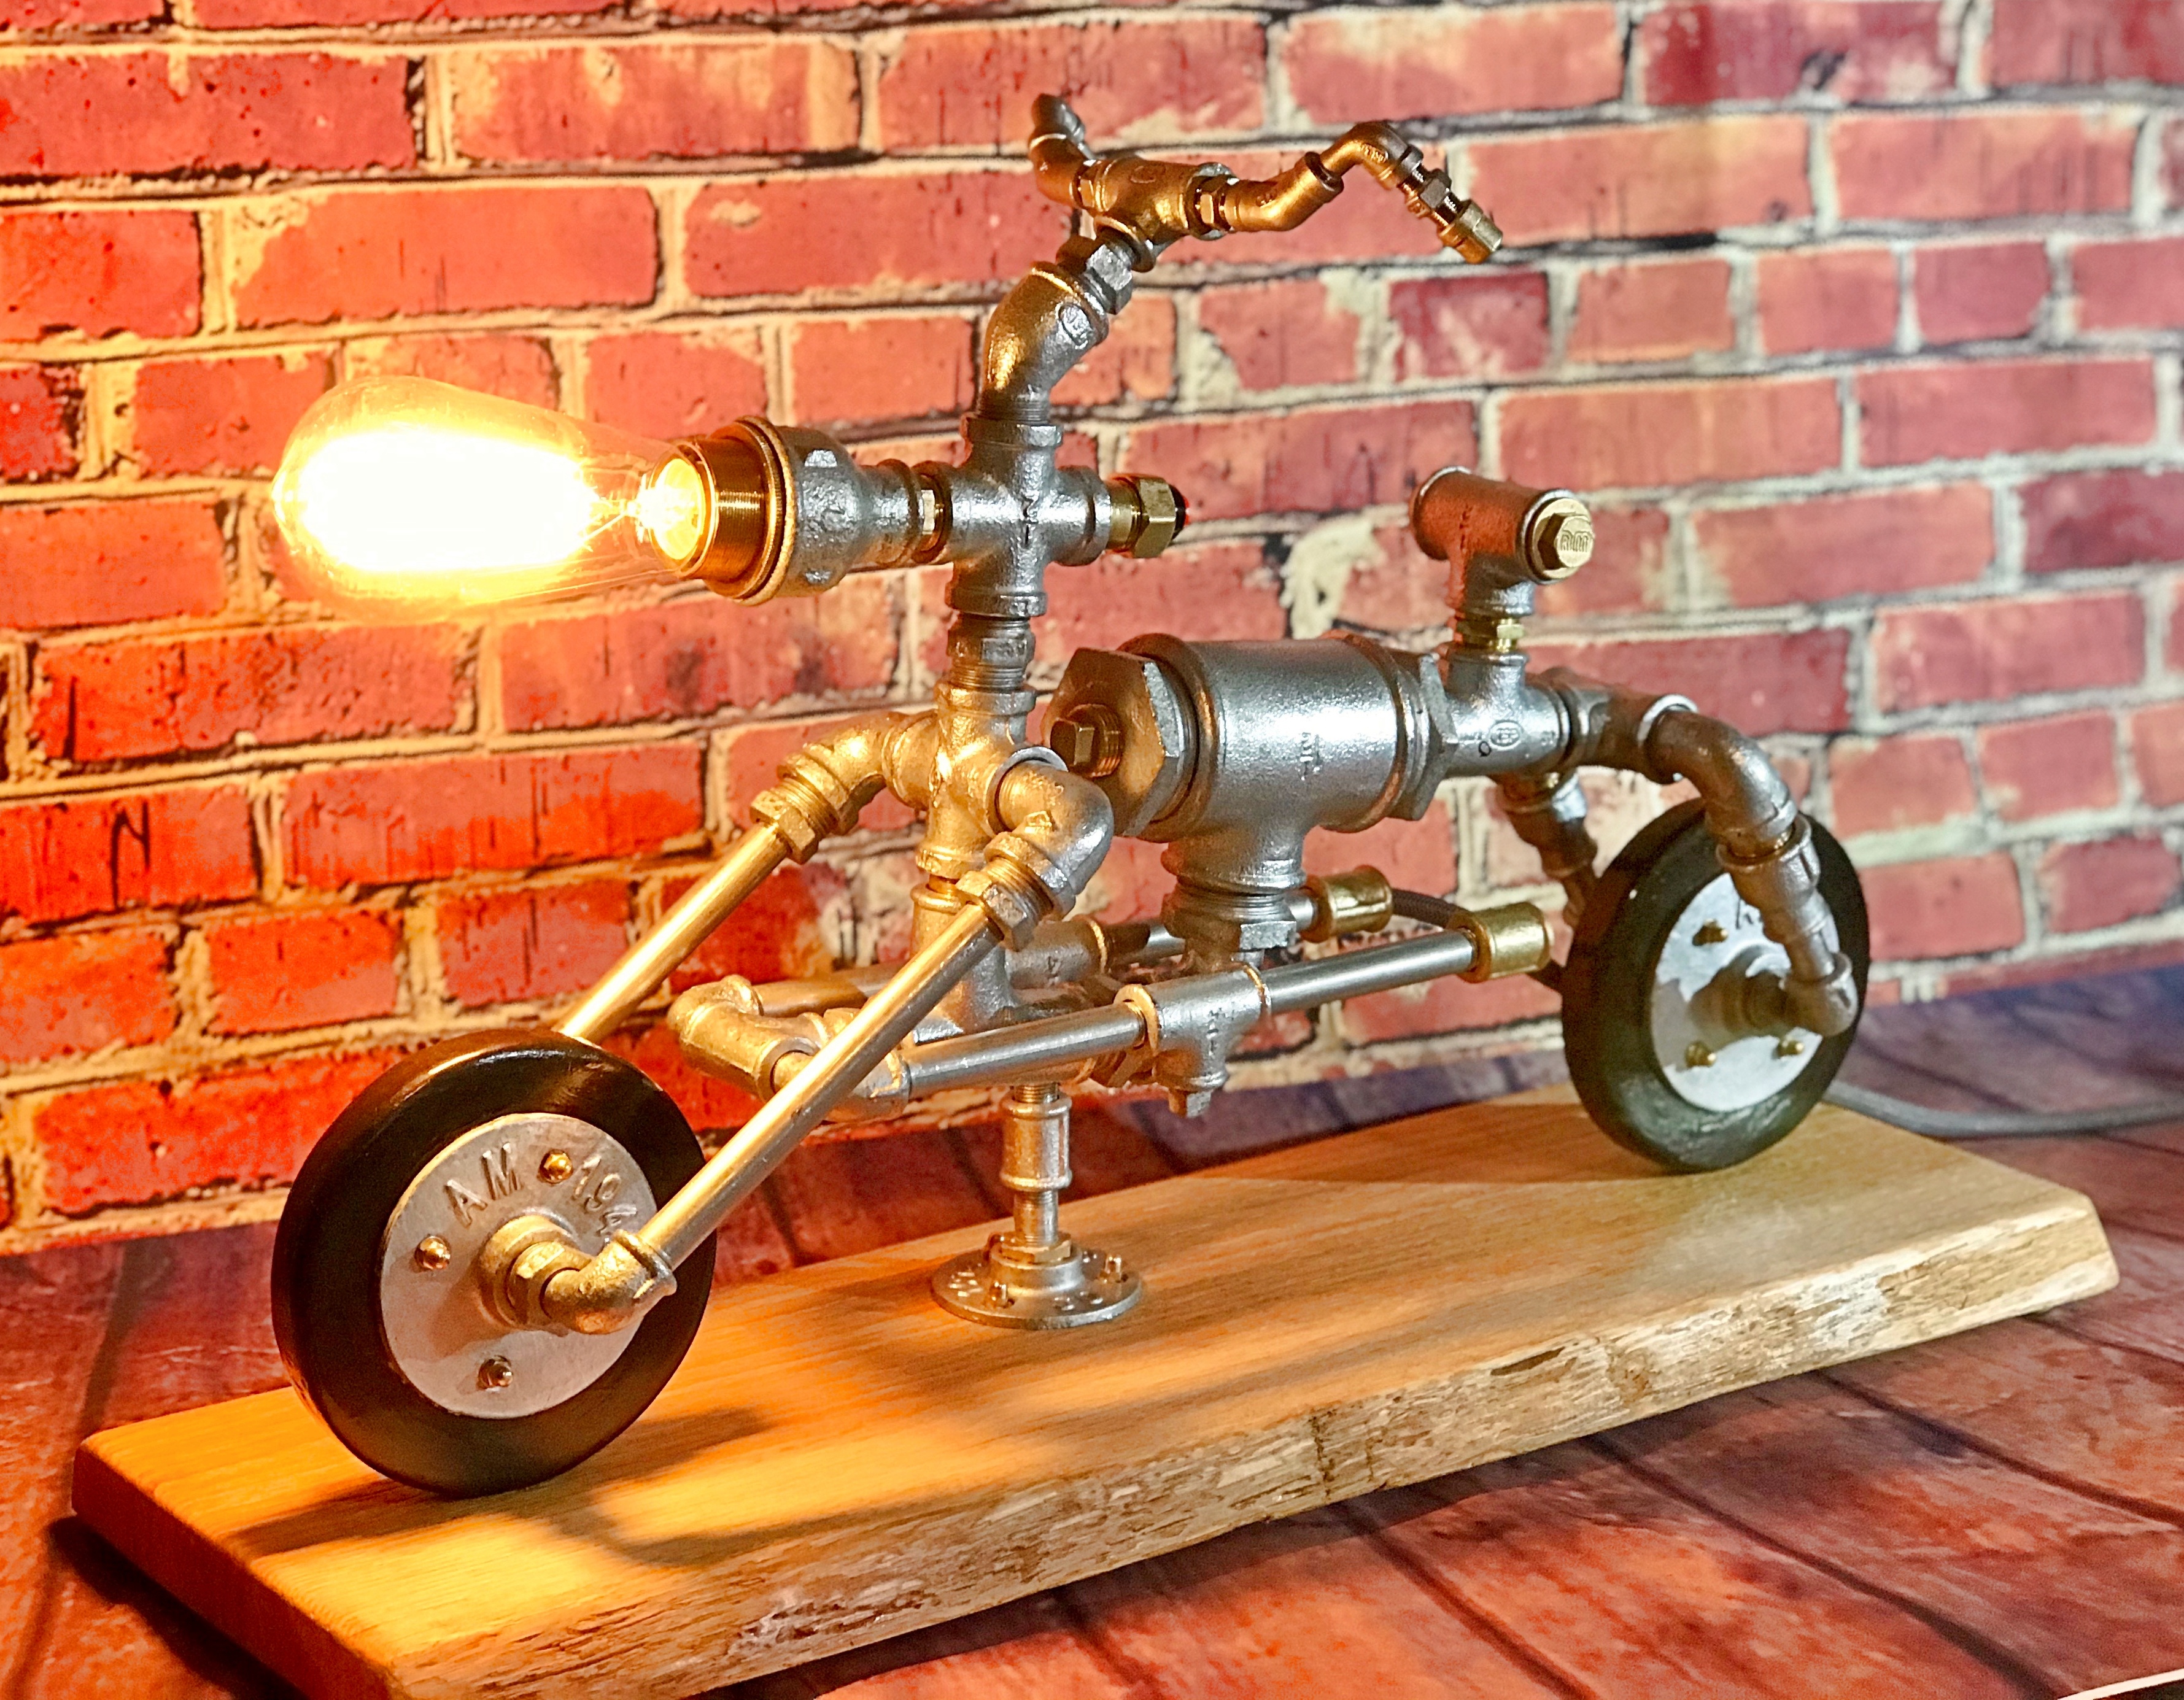
I think long and hard before starting a new lamp because every one is a unique creation. I do not churn out lamps, conveyor-belt style, just to fill the shelves. Some of my lamps are always going to be popular. With the vintage items it is the blowtorch lamps and the re-purposed GPO bell boxes from the 1930’s. I always have these in stock, but each one is always slightly different, particularly the blowtorches. With the pipe lamps, some pieces are so complex, and take so long to design and make, that I sort of class them as one-offs! The Steam Train, The Archer and The Motorcycle are good examples. There are some, however, such as The Dog lamp, which is always popular.
My approach to the vintage, repurposed lamps is always the same: careful dismantling; meticulous cleaning of all metal parts and repair (if required); sanding down of any wood and treating with Danish oil; deciding the positioning of the lamp parts and feasibility; safe routing of the cable and switch; initial test of electrical circuit; reassembly of the item; final check of electrics and PAT testing; choosing a suitable Edison filament bulb; and then a final clean & polish of the lamp before photography. I tend to use the antique-looking, cloth covered braised brown cable for these vintage lamps as it fits in well with the overall look.
The pipe lamp process is somewhat different. Initially I worked only in ¾” pipe fittings, but then realised that many of the resultant lamps were quite large! Now I use mainly ½” fittings with the addition of ¼”, and even ⅛”, fittings for more detailed areas. My lamp designs can reflect current tending topics (e.g. The Jedi, Spiderman); popular hobbies & activities (e.g. The Rock Singer, The Fisherman) or are made for special occasions (e.g. The Lover, The Couple). I also take commissions for pipe lamps, which can be very interesting and challenging!
I do have to smile sometimes when, at craft shows, I overhear someone saying “You've got a lot of old pipe fittings in the shed, George, you could easily make one of those lamps.” It is not quite that easy! All of my galvanised iron pipe components are British made and purchased new. They arrive often covered in grease (for protection). My first job is to remove the grease using a concentrated soap solution in hot water. Once clean the pieces are dried and then dipped in a solution of baby powder and milk and dried again! This neutralises any acid reaction of the air on the metal and protects it. There are a huge variety of fittings available—elbows; bends; straight sockets, reducing sockets; equal hexagon nipples; reducing nipples; reducing bushes; barrel nipples; flange plates; threaded pipes, etc. It is amazing how many of theses types—possibly in a range of sizes—are used in one pipe lamp. Has George got all these sorts in his shed? I very much doubt it! ☺
My lamp design is usually sketched out first and, if it going to be a robotic person, I will use a small artists wooden, jointed mannequin to get the pose correct. Once I am happy with the design I will begin assembling the components. Often, to achieve the right angle of some fittings, a vice and a considerable amount of strength is required to get that last few degrees of thread tightened! For this reason, much of the internal wiring and the switch need to be added at the same time as it might be impossible to undo some of the components later. Eventually, the piece is assembled, the wiring PAT tested and, if appropriate, the lamp is mounted on a sanded, oiled oak stand. Before polishing, any visible threads of the fittings are painted with Hammerite hammered-finish silver paint. All the galvanised fittings are then polished using a professional metal polish and the finished, gleaming lamp is ready to be photographed. The three core black electrical cable could be left as it is but, for the finishing touch—to make it look even more industrial—I enclose the exposed cable in a grey, polymer braided sleeve. I call it the Kevlar vest for my cable!
So there you have it. A brief look into what it takes to make unique, quirky and exciting Wacky Lamps! Please visit the website—www.wackylamps.co.uk—or email me at info@wackylamps.co.uk for more details, or if you have an queries.